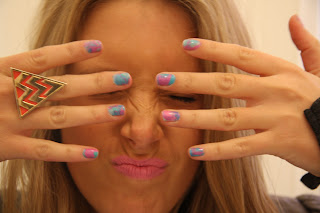
Hello all you nail art lovers,
Hope you are just as excited as I am bout this amazing new discovery!
I came across this amazing technique while on Pintrest, it is fun and easy, however, make sure you have some time as it took me an hour and a half to do!
Here are the steps:
1. Paint your nails white, using a clear base coat to protect your nail
2. Get a bowl of room temperature water, 3 of your favourite coloured polishes, some cotton buds, nail polish remover and some tooth picks.
(Optional: using sticky tape, tape the skin around your nails to make the clean up process easier - I didn't bother doing this)
3. One by one, drip one drop from each colour into the water, do this twice or three times depending on the look you are after
4. Using a tooth pick, create a design in the water
5. Dip nail into the water onto the design
6. Blow on the water to dry the polish surrounding your finger, then use a tooth pick to collect the excess (it will come up off the water quite easily - like the skin on milk after its been heated)
7. After about 15 seconds, remove your finger from the water and clean up around the nail using a cotton bud and nail polish remover (which is surprisingly easy as the polish has been diluted in the water)
8. Repeat these steps for all nails
9. Once dry, paint a clear top coat over the design.
AMAZING!
For a video tutorial, please go to:
http://www.youtube.com/watch?v=D9A_9FH7e-A


No comments:
Post a Comment